Customizing your Aimdoc Widget
In the Aimdoc dashboard, select the agent you want to customize and click the Edit Agent button to drill into the Agent Builder view. From here, you'll find several tabs that allow you to configure everything from messages to appearance and advanced engagement tactics.
1. Chat Settings: Crafting the Perfect First Impression
Chat Settings allow you to control how your agent greets and interacts with visitors. This is where you set the tone for the entire conversation.
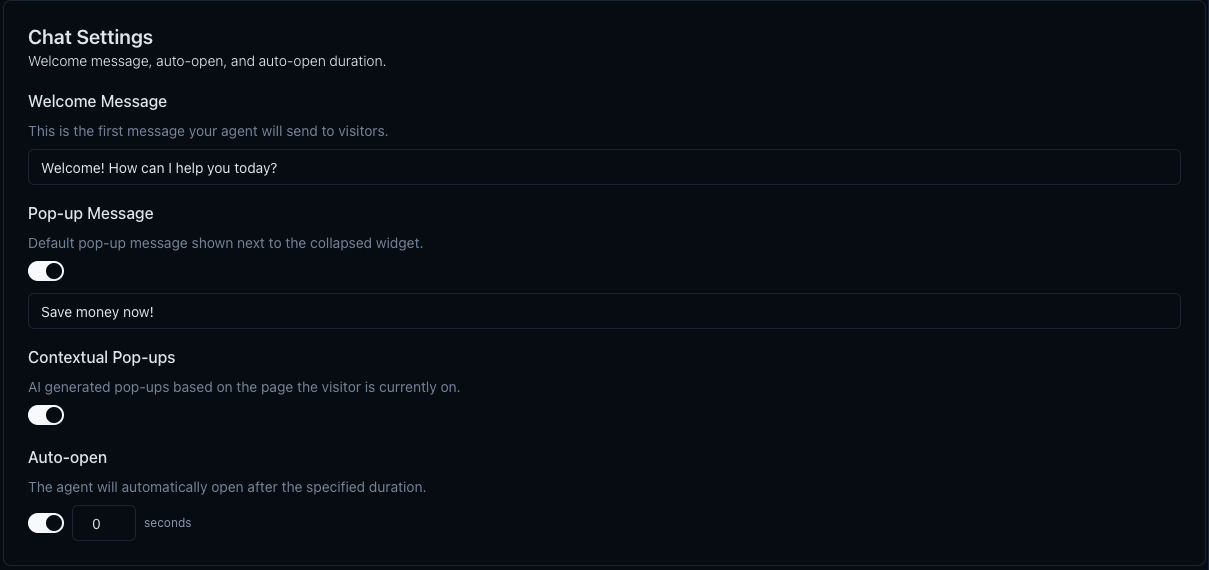
Welcome Message
Your welcome message is the first thing your visitors will see. Make it inviting and relevant!
- How to Configure:
- Navigate to
Chat Settings>Welcome Message - Input your message in the text field.
- Example:
"Welcome! How can I help you today?"
- Navigate to
Pop-up Message
Grab attention even when the chat widget is minimized.
- How to Enable: Toggle the
Pop-up Messageswitch to On. - Input a message that is short and action-oriented, like:
"Save money now!" - Pro Tip: Use urgency or curiosity to drive engagement.
Contextual Pop-ups
Take it to the next level with AI-generated messages tailored to the page your visitor is on.
- How to Enable: Toggle the
Contextual Pop-upsswitch to On. - Best Use Case: Promote relevant products or services based on visitor behavior.
Important: You can modify the generated pop-ups for each page by clicking on the desired website page in the knowledge base.
Auto-open
Make the chat widget automatically open after a specified duration.
- How to Enable: Toggle the
Auto-openswitch to On. - Set the Timing: Enter the delay time in seconds. For example,
0for instant open.
Tip: Use this strategically on high-value pages like product or pricing pages.
2. Chat Form: Qualify Leads Efficiently
The Chat Form lets you collect essential visitor information before the conversation even begins.
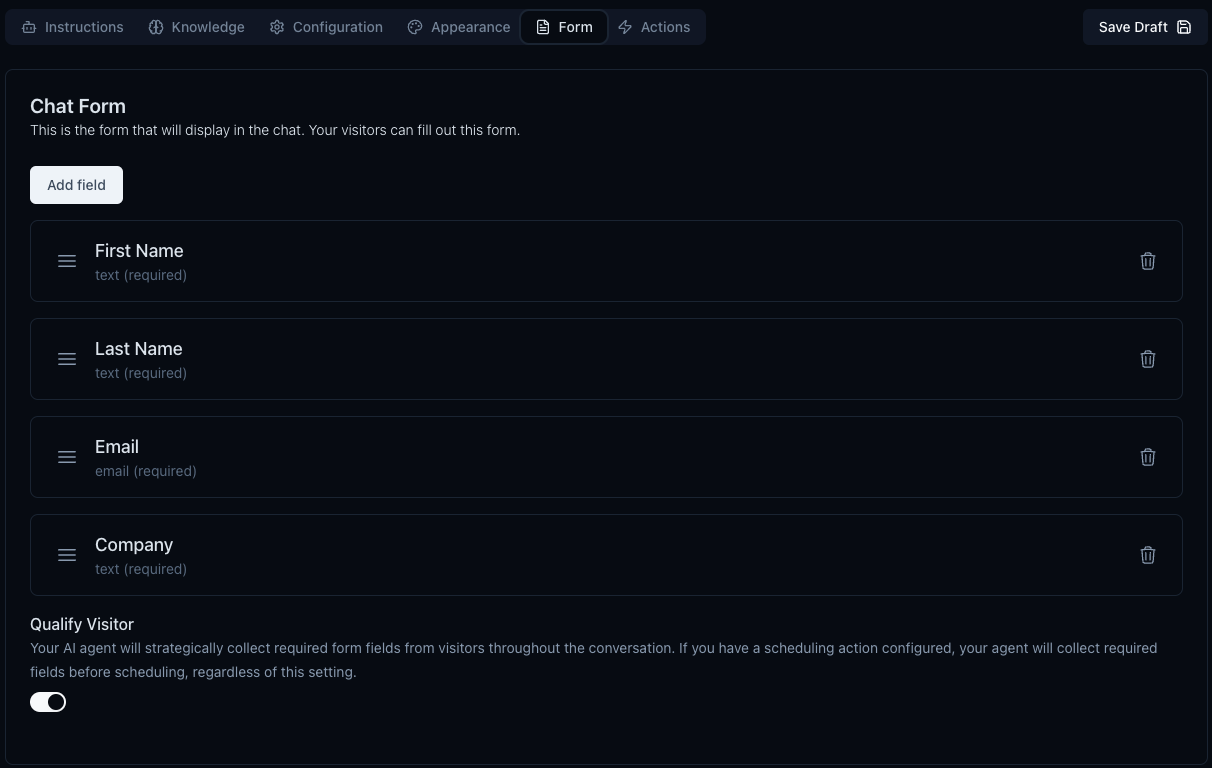
Adding Fields
Collecting the right information helps qualify leads and personalize the conversation.
- How to Add a Field:
- Click
Add field - Choose the type:
Text(e.g., First Name, Last Name, Company) orEmail
- Click
- Pro Tip: Keep it short. Only ask for the information you absolutely need.
Qualify Visitor
Strategically gather form fields as the conversation progresses.
- How to Enable: Toggle
Qualify Visitorto On. - Benefit: This keeps the chat flow natural while collecting the required details.
3. Appearance: Match Your Brand Identity
Your chat widget should seamlessly blend with your website's look and feel.
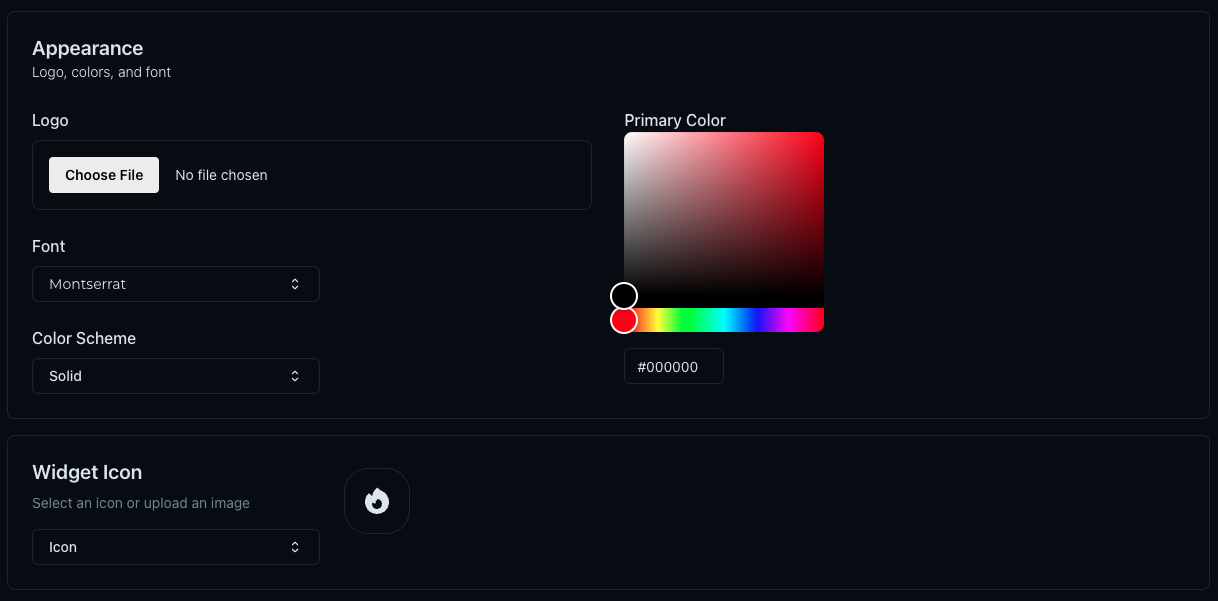
Logo
Upload your logo for consistent branding.
- How to Add: Click
Choose Fileand select your logo image. - Tip: Use a transparent PNG for a clean look.
Font & Color Scheme
Choose a font that complements your brand's identity.
- Select Font: From the dropdown, choose options like
Montserrat. - Customize Colors:
- Primary Color (
#f1ddff) - Gradient End Color (
#0088ff)
- Primary Color (
- Pro Tip: Use contrasting colors for better visibility and engagement.
Widget Icon
Select a default icon or upload a custom image.
- How to Configure: Choose from the dropdown or upload a new icon.
4. Escalation Buttons: Seamlessly Connect to Sales or Support
Enable your visitors to escalate the conversation to a human agent or get a revised answer with ease. These are open-ended, you can set a label and define how the agent should act.

Here are two common examples Aimdoc customers use:
i.e "Talk to Sales"
- Purpose: Connect visitors directly to a sales rep.
- Tip: Try this on high-intent pages to convert leads faster.
i.e "Regenerate"
Allow visitors to request a revised response.
- Use Case: Ideal for clarifying complex queries.
5. Conversation Starters: Encourage Engagement
Kickstart conversations with predefined questions that visitors can click on.
Default Starters
Set frequently asked questions to reduce typing friction.
Examples:
How does it work?How much is it?Why should I use?
Pro Tip: These should be short and relevant to your product or service.
Contextual Starters
When Aimdoc AI trains on your website, it generates a set of conversation starters for each page. When Contextual Starters is toggled on, the visitor will see these page specific starters.
- How to Enable: Toggle
Contextual Startersto On.
Important: You can modify the generated starters for each page by clicking on the desired website page in the knowledge base.
AI Follow-ups
Automatically generate follow-up questions to keep the conversation going.
- How to Enable: Toggle
AI Follow-upsto On.
6. Links: Provide Instant Access to Resources
Direct visitors to helpful resources right from the chat window.
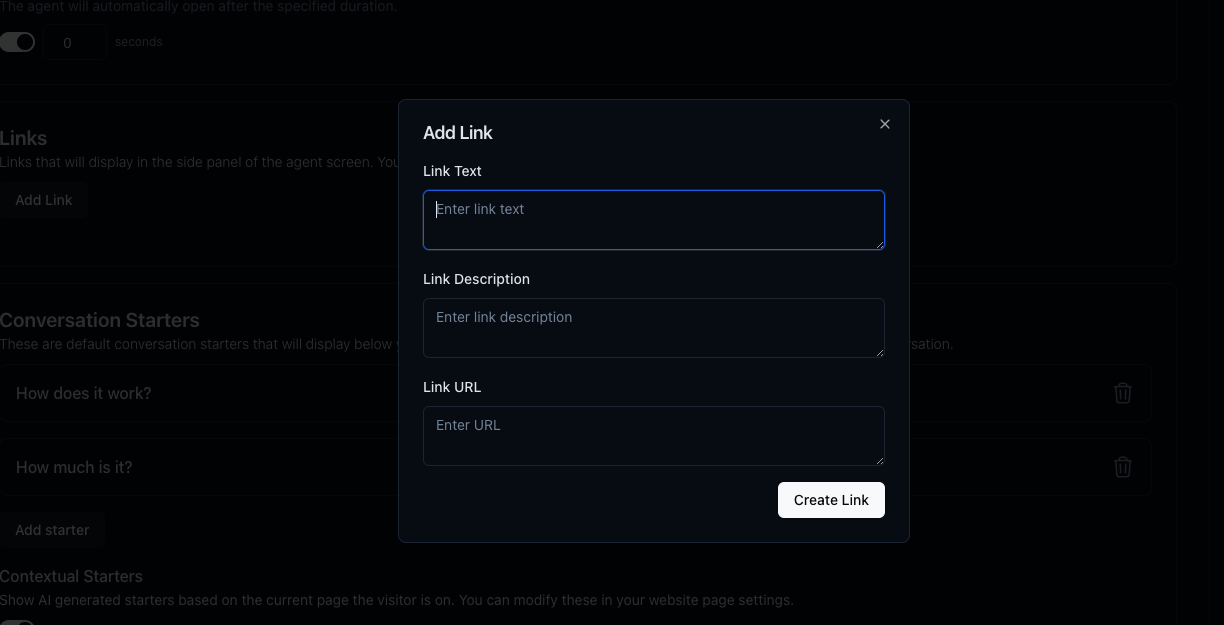
Adding Links
- How to Add: Click
Add Link - Fields to Fill:
- Link Text: Display text
- Link Description: Brief summary
- Link URL: Full URL
- Example:
- Link Text: `Learn More`
- Link Description: `Discover more about our services`
- Link URL: `https://example.com`
Conclusion
Congratulations! You now have a fully customized Aimdoc agent tailored to engage, qualify, and convert visitors effectively. Remember, the key to a successful chat experience is continuous testing and optimization. You can integrate Aimdoc with your CRM, email, and other tools to automate your sales and support processes here as well.
Happy Customizing!
This guide is brought to you by the Aimdoc team, dedicated to enhancing your customer engagement experiences.